Squash Book Tutorial
 |
| Squash Book Tutorial |
Right now I am in the middle of Plants![ Daughters school theme this month is on various subtopics on plants!]When I saw a squash book at Loris blog I knew this was just right for a school project with numerous pictures.If you make one I assure you you will fall in love with it just like I did. My daughter loved it too!The squash book can be made to fit into your palm and open up to a large spread!
 |
| Squash Book Tutorial |
We made this project to incorporate some pictures for the theme "Uses of plants"
 |
| Squash Book Tutorial |
You can adapt it to use in a scrapbook or use it as a card you can embellish away!
Materials Required to make a squash book
- 3 Squares of paper- of the same size
Size of the squares- Your folded squash book will be half the width of your square
Thickness of paper- as thin or as thick as you want!
- Glue
- Ribbon/Magnet or Velcro or anything else you can think of to hold your squash book folded
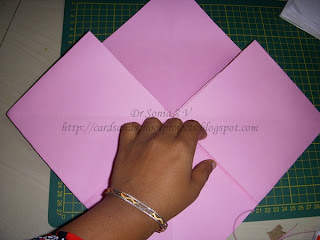
How to make a Squash BookFold the 3 squares in half vertically and horizontally and along one diagonal.Use the template picture below as a guide to the folds.[Its easy -don't get fooled by the terminology to think its difficult]
 |
| Squash book template |
Align the squares as shown.
 |
| Squash book template |
The outer two squares should have their folds in the same way while the central square should have the folds in the opposite way while you lay them on top of each other.
 |
| Squash Book Template |
Stick on both the end squares on top of the central square at the place they overlap.
|
| Squash Book Tutorial |
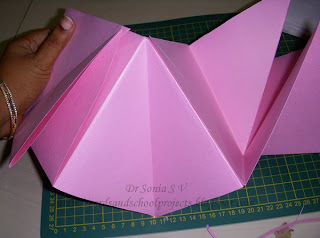
Fold as shown. If your folds are correct you wont have any problem to squash it otherwise you can rework your folds as I have shown in the steps below and still get a gorgeous Squash book!
Fold in the lower inner panel of your outer square towards the center square as shown
 |
| Squash Book Folding 1 |
Fold in the upper inner panel of the outer square towards the central square like you did above
 |
| Squash Book Folding 2 |
Fold the other outer square in the same way and now you have a shape as shown
 |
| Squash Book Folding 3 |
Fold in the lower and upper central folds of your central square and your Squash book is ready!
 |
| Squash Book Folding 4 |
You can hold the squash book folded with a ribbon[like we did], magnet or a Velcro strip.The lovely strawberry ribbon is from my blogger friend
Romina - Thank You
Romina!
http://cardsandschoolprojects.blogspot.com/2011/07/squash-book-tutorial.html


Comments (0)
You don't have permission to comment on this page.